


You know those gorgeous statement flower walls you see at stores and parties that are totally Instagrammable? (Hampton Social in Chicago and Skinny Dip in Charleston are two of my recent favorites!) Ever wonder how to make your own for your next party? Today I'm sharing just how to do so and I'm going to let you in on a little secret... it's so simple!
There are so many different ways you can make your own flower wall. You can use various types of flowers, flowers of the same type in different colors (like I did) or add in greenery. Your options are limitless! My only suggestion would be to avoid flowers like tulips that tend to wilt quickly when not in water.
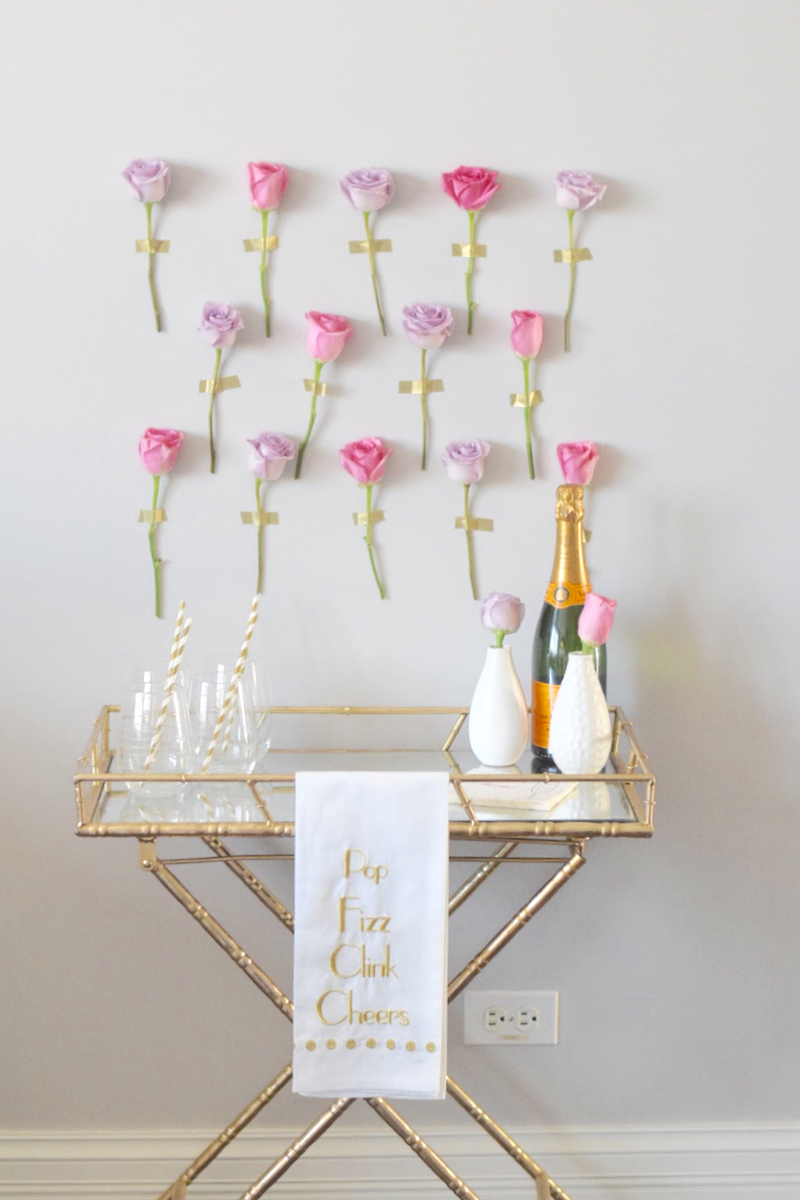
I placed my flower wall above my bar cart for a recent happy hour, but you could also use a flower wall to add decor to a dessert table or even as a photo booth wall (don't forget the props!).
Instructions:
- Gather your flowers and trim them to your desired length. I cut each flower stem to be about six inches long. If you are using roses, peel back the outer layer of petals.
- Cut 1 inch strips of washi tape and tape to the wall in the pattern you want to arrange your flowers in. Putting the tape on the wall first let's you play around with your layout without having to handle the flowers too much.
- Once you are happy with your layout begin adding the flowers to your wall.